There have certainly been times when you needed to sign some DOCX or PDF document, and you didn’t have access to a printer so you could print the document and sign it by hand.
Apple’s infrastructure has long made it possible to add a digital signature to a document.
Check out how to add a signature to a document using built-in macOS and iOS features in Pages and/or Microsoft Word.
Creating a unique signature will allow you to sign documents in the future as well.
Adding a signature in a document – macOS/iPadOS/iOS
The following option allows you to add a signature to a document for macOS/iPadOS/iOS users only.
- In the document, go to the place where your signature should be.
- With the CMD+Shift+4 shortcut, create a screenshot of where your signature will be.
- In the snapshot editor, select the “Sign” option highlighted in red.
- Click the option “Create signature.”
- After selecting this option, a window will appear where you need to add your signature – with the help of a touchpad, a photo from the camera or an iPhone.
- Select the signature you created and add it to the screenshot we took at the beginning.
- Now all you have to do is stretch the signature to the appropriate width.
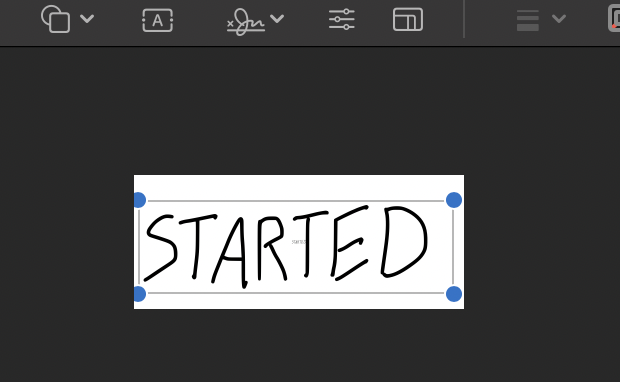
- Once the signature is added, all you have to do is add the signature graphic to the document on which it should appear.
- In Pages, select “Multimedia” -> “Select…” on the top bar. Once you select the appropriate signature file, it will be added to the document in Pages.
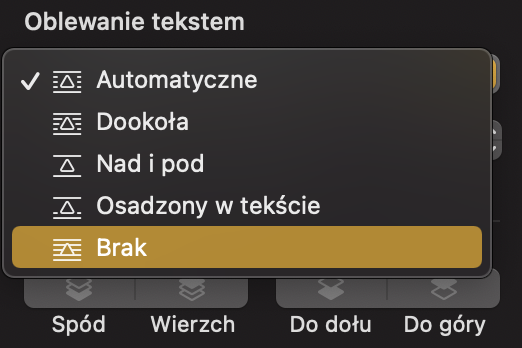
- All that’s left is to insert the signature in the right place. To do this, click on the added graphic with the signature. On the right side, you will see an additional panel, where you can select “Text wrapping” -> “None”.
- Put the signature in the right place 🙂


